Greg has designed an automatic animal and plant water network over the years. It is quite amazing. There are several components to the network. We need to water each of the 27 fruit orchard trees which is on a single timer. We have a large garden with 21 garden rows and 4 rows of berries/grapes and a planted entry arbor that is on 5 timers. The main orchard arbor is covered in honeysuckle which requires a timer. The front yard is on two timers which brings it to total of nine.
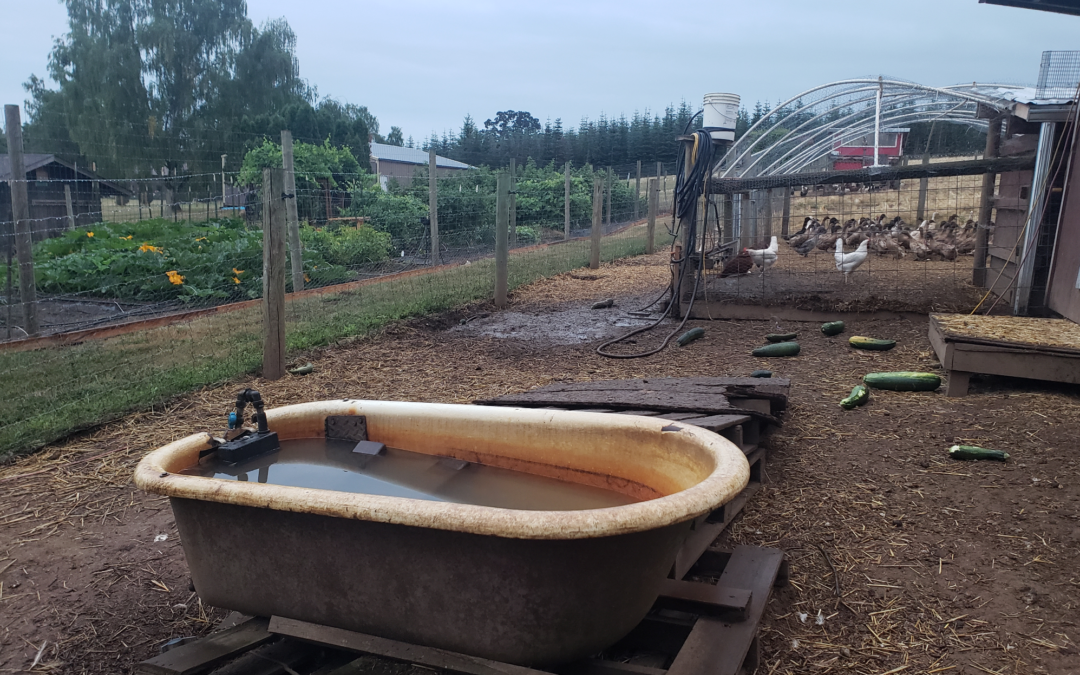
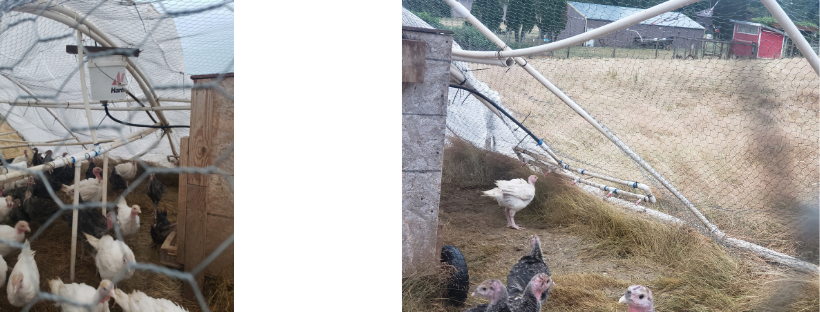
The most important watering systems provide clean water to the animals. These are not on timers. They are pressure fed systems with floats that regulate gravity fed water. There are multiple water troughs for the big animals, one trough for the ducks to swim in and finally poultry watering systems for chickens, turkeys and ducks to drink from. Greg has recreated the poultry watering systems several times and with slight variations. It is fairly simple and only take a couple hours to build. At this point, we have four around the Ranch. Some are even mobile using garden hoses in lieu of permanent poly pipe. They are a significant part of making our lives easier. Without them, we would have to refill water containers once or twice a day which is not an option with our busy schedules. At this moment, there is one in the chicken coop, duck coop, mobile poultry tractor, and one in a barn stall that we use when the birds are small and too young to be outside.
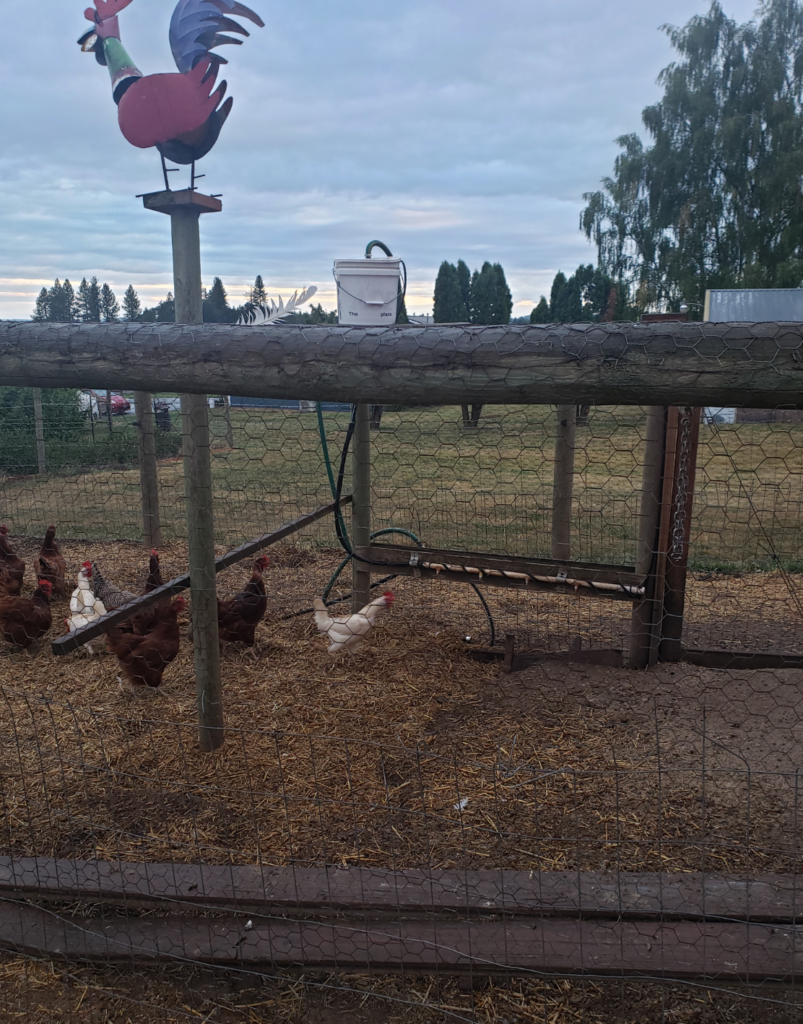
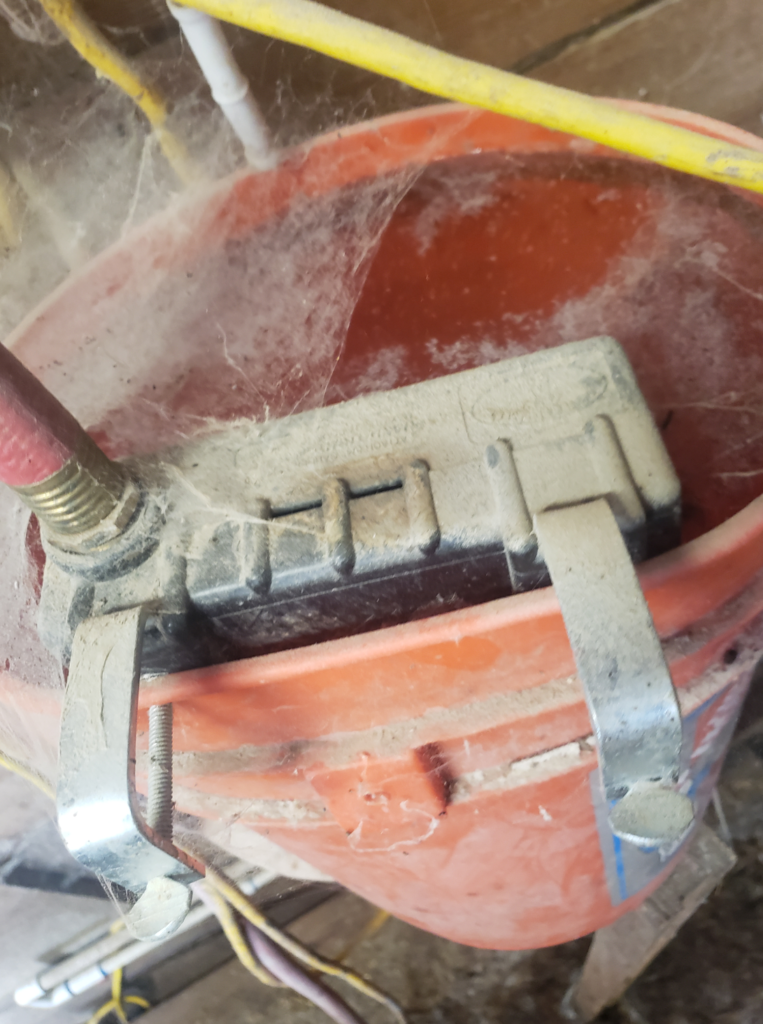
The basic concept of the poultry watering system is a bucket with a float in it that holds water. There is a polypipe or garden hose that feeds water to the bucket depending on its location. The water leaves the bucket through poly pipe and then delivers water to a looped nipple bar. That is a long piece of PVC with 5 or 6 nipples on them. The nipples are screwed into a special PVC tee. The birds go up to the nipples and drink water by pecking at them. As the bucket water level drops, the float allows water in to fill it back up. With the bucket always full, a consistent pressure is delivered. In previous attempts, a pressure regulator was used, but with the inconsistent pressure we have on the farm, these systems wouldn’t work. In the winter, PVC has a tendency to freeze and break, so the ones that get used year-round need to have heat tape wrapped around the PVC to allow it to function and not brake during the cold winter months. This heat tape is also wrapped around the bucket of water to keep the reservoir from freezing. This buys us some time until the daytime temperature can thaw out the distribution piping that is essentially on the ground surface.
Greg is now going to explain the basic construction of the watering system in case you want to make your own at home.
You will need:
~Plastic basic bucket and a lid, preferably UV resistant. (Lid helps keep debris out)
~Standard float like this one:
~A float like this also works well:
(this style works well in outside buckets because you can put a lid)
~A bulkhead fitting like this one for the bottom of the bucket that allows water out and is leak-free:

~PVC poultry nipple tees like these:
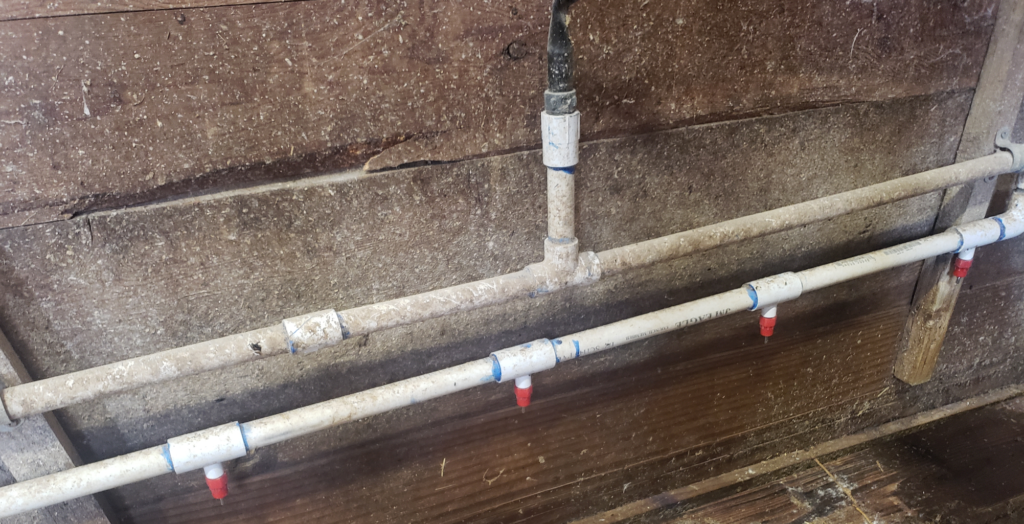
~Extra poultry nipples like these: (They need to occasionally be replaced and cleaned. It’s really nice to have extras around)
~Automatic heat tape like this to wrap your system:

(would recommend creating a circuit for even pressure over bar if possible)
~A stick of ½” PVC, four elbows, one tee and misc. custom fittings from the hardware store to put it all together. Don’t forget PVC glue and a way to cut the PVC pipe.
~A roll of poly pipe or a garden hose with appropriate fittings to hook up your automatic float valve to a water source and to hook up your PVC water nipple system to the bulk head on the bottom of the water bucket.
Figure out a way to support your bucket about 3-4′ above the watering nipple system. I don’t recommend hanging it by the handle as this will eventually distort your bucket. Also, figure out a way to support your watering nipple system that allows the chickens to comfortably peck at the nipples.
Maintenance is fairly simple. I occasionally pour a little bleach in each bucket to keep the bacteria build up down. Also, a nipple periodically will get clogged and need cleaned or replaced.
The importance of these automated systems can’t be emphasized enough. They save a tremendous amount of time, allow us to leave the farm for extended periods of time without worries, and provides clean consistent water to both plants and animals.
If you have any questions or issues assembling your automatic watering system, feel free to drop a comment below or reach out to us.
*Disclaimer: This post contains affiliate links
Trackbacks/Pingbacks